How to create a channel page
Introduction
Channel pages allow us to organise the website content based on topics or companies. Channels can be branded and filter website content based on what you would like to show.
Instructions
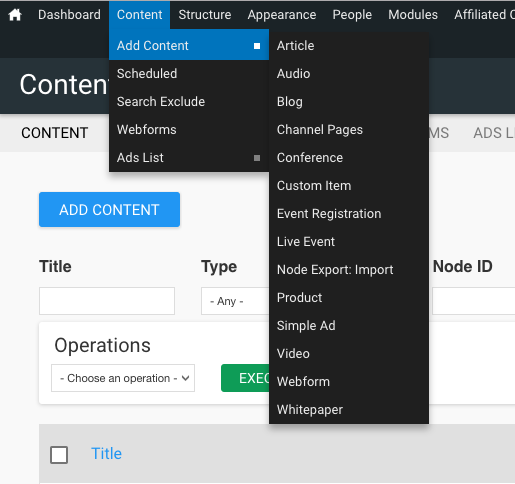
Access the "Create Channel Page" form on Titan/Hydra/Insure. There are a number of ways to do this. Either from the content menu on the admin bar (accessible from all admin pages), from the dashboard page or from the "All Content" page.
-
'Domain access options' allows you to select the sites you wish to publish your channel to. You can select the relevant sites and still set the channel up as 'Private' to use for sign off purposes.
-
The Akademia Sponsor section will allow you to upload a sponsors logo to appear in the channel header. Limitations regarding file size and dimensions are listed on the form. This only affects channels on the Akademia website.
-
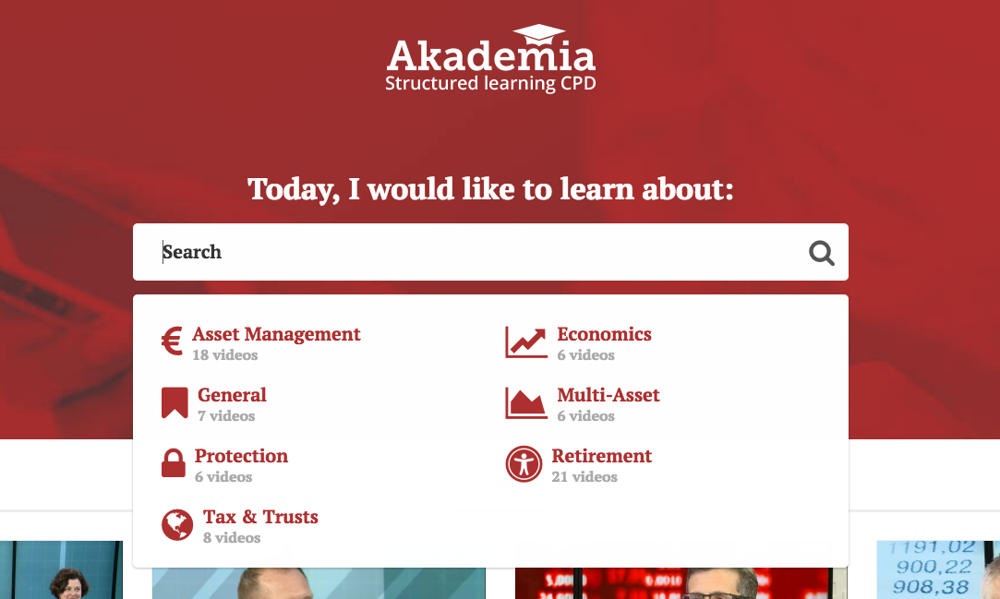
The Akademia Icon requires the name of a FontAwesome icon - the form contains a link to the site where you can browse icons and get their name. When added the icon appears next to your channel page on the main list on the Akademia Homepage.
The Primary Details tab…
The title field will be the name of the channel as it would appear in the Channels Directory on the site. This text would also appear at the top of an unbranded page, or if your page is viewed on a mobile phone.
The Channel Headline, Description and Disclaimer do not appear on the channel pages but can be utilised for admin purposes (i.e. using the description or summary you can leave an explanation for the channel that’s been set up to help colleagues who may be editing the channel further down the line).
The Channel Type dropdown provides you with four options:
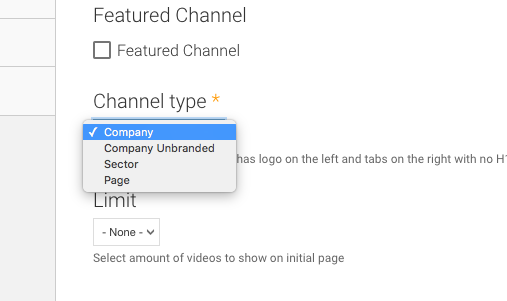
Company – This allows you to create a branded company page using the client’s logo in the header
Company unbranded – This provides admin a means to link all the clients media. An unbranded channel would not appear on the site but should be created so that clients media can use it as a 'Primary Channel Page'. See our unbranded channel page guide for further information
Sector – Similar to the unbranded company, however the layout of the header is slightly amended
Page – useful for creating non-video channel pages such as A-Z lists (i.e. Glossary).
A QUICK CHANNEL PAGE FOR A NEW CLIENT?
As all video records need to be assigned to a channel page so you’ll want to create a very quick channel page for a new client, rather than positing their media onto a page that isn’t really relevant.
To quickly create a very basic channel page that maintains consistency with similar pages on the Asset.tv site you can follow the below checklist to create the page very quickly:
Assign the client’s name as the Channel Page title under the Primary Details tab. You will also want to set the Channel Type to "Company Unbranded".
Under Channel Contains you will need to place the company’s name in the Company field. Don’t worry if this is the first record that the company will have been featured in – when you save this record it will create the company term automatically – IT IS VERY IMPORTANT THAT YOU SPELL THE COMPANY NAME CORRECTLY WHEN DOING THIS. Once created when you start typing the company name on other records in the Company taxonomy field it will start to autofill.
Once saved the channel will appear on your media’s "Primary Channel" drop down.
The Channel Contains tab...
-
This tab will look similar to the taxonomy tab on other content such as videos and will feature a text field for Owner, Company, Asset Class, Person and Tag.
-
Any term completed in any field will result in your channel page pulling corresponding content through to your channel page – i.e. if you were to set "Person" to "Joe LaVorgna" then your channel page would pull through any videos featuring Joe LaVorgna (assuming the video record has been tagged correctly).
-
You can include more than one term in each field – simply separate with a comma.
-
By using multiple terms or utilising more than one of the fields you can create pages that are an assortment of media i.e. if you completed "Multi Asset" and "Europe" the page would feature any content tagged with EITHER of those terms.
-
When entering a term the field will provide you with a list of options based on pre-existing terms. This will allow you to ensure you select the correct term. If you’re term doesn't exist it will be created once you save your channel page.
-
At the bottom of this tab you can also choose to have featured items at the top of the channel page. There are three options:
- -none- will simply create a page containing the content with the tags you’ve entered
- Carousel list this will create a slider at the top of the page that can link to various items
- Default video this will simply place a player at the top of the page automatically playing the selected video
-
Selecting Carousel list will create a table of "Featured Items" for you – starting with one but with the option to "Add another item". To add your item you’ll just need to start typing the title of the item you wish to feature. As with the terms this field will start to auto complete allowing you to select the correct item you want to feature.
-
Carousel lists can link to videos, blog posts, whitepapers or custom links. Once you have completed the table of items you can then drag and drop the rows to change the order in which they appear.
-
Selecting "Default video" works in a similar way but will only allow you to enter one video item – the field will autocomplete once you start entering the title. If left blank the newest video on that channel page will play.
The Tabs tab...
Warning
N.B. tabs can only be added to branded channel pages
-
By adding tabs you can provide viewers with options for how the media on a channel page is organised
-
Using the dropdown you can select the way in which the media is organised:
- -none- No tab(s) created
- Latest Videos The newest videos will appear at the top of the list -This is the default way the videos would display if no tabs are created
- Most Viewed Media is organised based on views with the most viewed at the top
- Content List This changes how the media is presented on the page, instead of thumbnails laid out in a grid the content is presented in rows
- Term Types This allows other node types such as Blogs, Whitepapers etc. to appear on a channel page
- Node Selecting a node will create a tab where you can single out an item to be featured. Start typing the name of the content and this will autofill
- A-Z This will allow the viewer to organise the contents by title
- Custom View This would be required to create a bespoke view and would need input from the Web Team
- HTML Content This allows you to paste in HTML code to display
- RSS Feed You can chose an RSS feed from the dropdown that will appear. You will need to creat the RSS feed firse
- Playlist You can show a pre-existing playlist.
- Latest Videos (include unpublished) This can be used to allow private videos to appear on the channel. This can allow you to set up a channel for review or include videos you do not want to appear elsewhere on the site.
-
You can add multiple tabs, and then drag and drop the items to change the order they appear (with the top item being the first on the left).
-
For some tabs such as Most Viewed a drop down for "Limit" will appear. This is a numerical value you can enter to limit or increase the number of items that show under that tab. This will cut off the list being shown based on that number – it does not create extra pages to continue the list
Warning
When creating tabs for your channel page we would suggest creating a "Latest videos" tab as the first – this will allow your viewers to navigate back to your companies media without having to go via the channels menu again or use the browser back button.
The ASide tab...
ASide elements will appear on the right hand side of the channel page when set to 'Takeover' (set on the Style Tab)
- Using the drop-down you can select a number of ASide options:
- -none- No ASide element
- Image A non-interactive image can be uploaded directly to Titan
- HTML The most adaptable of the elements HTML will allow you to enter HTML code for dynamic elements.
- Link A simple text link – you can enter a title (the text to appear as the link) along with the URL
- Latest/Trending This block will feature quick links to the five latest videos published to the site along with a tab option to see the top five videos based on recent views
- Twitter Show a Twitter feed either using the clients twitter handle, or if appropriate a particular hastag
- Channel Block A block of featured video channel
- Events Calendar This will display the upcoming events (Masterclass)
- RSS Feed You can chose a pre-existing RSS feed to appear in the sidebar. You will need to creat the RSS feed firse
- Editors Picks A pre-existing list of site videos managed via nodequeues
- Trending Videos The top 5 videos based on views will show
- Company Info Widget Select a company using the autofill field and enter any copy including links to display in the sidebar
- Top Contributors Include a block of logos with links to sponsors pages (similar to the Featured Channels block on the homepage)
- EIP Partners Grid Similar to the Top Contributors a block of logos (managed via nodequeues) will show in the sidebar
- Silver Sponsors Grid Similar to the Top Contributors a block of logos (managed via nodequeues) will show in the sidebar
Twitter Feeds
- To create a Twitter widget you’ll need to log in to a Twitter account. Access the setting menu via the menu in the top right of the screen.
- Select the "Widgets" tab and select "Create new".
- Under the "Choose a timeline source" there are a number of tabs that allow you to collate different feeds.
- Use the live preview to generate the feed you wish to feature.
- Once you have the feed you want to feature you select "Create Widget" which will return you to the "Widgets" tab. Then select "Edit" next to your newly created feed. Under the live preview you’ll now have an embed code you can copy and paste into your channel a-side element.
- When adding Twitter to the ASide elements select "Widget" and paste your code into the text box.
Warning
You can select "Custom" under the Twitter type and this only requires a twitter handle and number to limit the tweets to show, however this method can fail when Twitter make fundamental changes to how their site works – the widget option is hosted by Twitter so would not be affected in the same way.
The Style tab...
Warning
Styles cannot be applied to 'Unbranded company' pages.
-
Each field allows you to upload an image which can be utilised for a header banner, the company’s logo (appears in the header) as well as background images. Each field explains any limitations (i.e. file type/size).
-
You can also choose the channel’s primary colour to match a client’s corporate colour. N.B. This primary colour will also affect headers for videos that have your channel page selected as the "Primary Channel" (see How to create a video guide).
-
The custom CSS field allows you to enter unique CSS stylings for this channel page only. For example you can use this can be used to have A-Side elements only show in certain regions (see Guide Making Channel Page Asides Unique to Regions or Hiding Channel Tabs by Region).
The Site Embed tab...
The Site Embed feature allows clients to feature the channel directly on their own sites.
-
Check the "Enable Embed" box or embed codes will only return an error.
-
The Expiry Date allows you to limit how long the channel can be embedded. This allows sales to set a limit based on the clients deal.
-
Allowed sites gives extra security by only allowing the channel to work on certain domains. Enter the URL of the site where it will be embedded. Attempts to embed elsewhere will return an error. If you do not require this feature leave the field with just the * entered.
-
Under Embed type are a number of style options. Visit the link available here to review the styles and ensure you select the correct one for your client.
-
Embed player allows you to link a specific player to the channel allowing for more accurate MI.
-
Navigation type is a style option and the differences can be reviewed on the template options link under Embed Type.
-
To load the embed script when you have completed the options save the channel record and return to the embed tab. The embed code can be copied from the Embed Script field.
The URL path settings tab...
-
The URL Path Settings tab allows you to dictate the URL rather than relying on the automatically generated one
-
Unselect "Generate automatic URL alias
-
The URL Alias field is then editable and can be altered to the desired URL.
Warning
Your new URL can't match an existing record or contain special characters such as ?, & etc. - The system will give you an error if either of these things are found.
The Menu Settings tab...
-
By ticking the "Provide a menu link" you will be able to add a direct link to your Channel Page to a menu on the site. Once ticked several other fields will appear
-
The Menu Link titles allows you to set the text users will see when accessing your link from the menu where it will appear
-
Selecting a Parent Item allows you to have the channel appear as a sub menu on the selected Parent
-
The Weight drop down field lets you set the importance of your menu item. The lower the number the further up the menu your link will appear. Likewise by increasing the Weight number you can move your link further down the menu
-
Menu Link Attributes provide some more advanced features for your link. The Title field here won’t be what’s displayed in the menu but instead appears as a little box of text when a user hoovers over the link. This allows you to provide the user with a bit more of an explanation of where the link goes
-
The other options in the Menu Link Attributes section, and in the Menu Item Attributes allow you to create HTML or CSS classes around your links which can then be used for styling
Warning
If you are not sure of what these items are from the labelling or how you would go on to utilize them and affect the styling then it is recommendable that you do not enter anything in those fields.
The XML sitemap tab...
Warning
This relates to how the channel page is read by search engines. You should not edit these settings unless you're absolutely sure of what it will do.
The Meta tags tab...
Warning
This relates to how the channel page is read by search engines. You should not edit these settings unless you're absolutely sure of what it will do.
The Revision Information tab...
-
The revision information tab is to maintain communication between multiple users working on content.
-
By ticking the "Create new revision" box and entering a message a log can be added to your Channel Page record to document any changes.
-
When revisions are present on a record a new tab will appear called "Revisions". This new tab will list the revisions made and detail who made them. N.B. even if you don't enter a message the date and user who made changes will be recorded here
-
This list provides you with "Revert" and a "Delete" link. Delete will simply remove the comment that was made from this list. Revert will return the record to how it was before the revision was added.
The Scheduling options tab...
-
Enter a date and time for the channel page to go live and/or to be removed from the site.
-
If you set a 'Publish On' date when you save the record it will automatically untick 'Published' on the Publish Options tab.
-
Your content will be published, or unpublished as per the dates entered.
The Authoring information tab...
See and change who created the content and the date it was created ("Authored on" date).
The Author and Authored on date will autofill so there is no need to manually enter these. Changing the Authored on date for a channel page will have no effect on where it sits on the site.
The Publishing options tab...
-
Published To make your media available on your site ensure the "Published" box is checked. Likewise, to remove the content un-tick this.
-
Promoted to the front page is utilised for video posts so has no effect on your channel page.
-
Sticky at the top of lists is currently an inactive option superseded by our nodequeues so will not have any impact on Channel Pages.
-
Private Channel prevents your page from appearing on site menus even if added to a nodequeue, so can be used for a client to approve any design elements.
-
Archive prompts you to enter a date so a record is kept of when a channel page was unpublished. It is not automated so will need to be selected manually.
-
Exclude from search will exclude your channel from site searches, the Primary Channel dropdown list on video records, and the autofill feature where it shows channels. This can be utilised for sign off purposes.